
HOW TO USE CANVA LIKE THE ULTIMATE PRO
Let’s start off this post with a few facts.
- When people hear information, they’re only likely to remember 10% of it three days later. But if a relevant image is paired with that information, people will remember 65% of the information three days later.
- 37% of marketers said visual marketing was the most important form of content for their business.
- Tweets with images receive 150% more retweets than tweets without images.
Why am I sharing these stats with you?
Because it’s hugely important to make sure you include shareable images in blog posts, and for your content on Twitter, Instagram, Facebook and Pinterest.
Sounds great, Holly - but isn’t that super difficult to do?
Not with Canva.
You might think you need to have design skills to create an amazing graphic. You might think you need to invest in all the top tools: Photoshop for editing, InDesign for adding fonts, another app for filters, and let’s not even get started on all the stock photo sites out there.
Not with Canva.
Canva includes all of these features. It’s got an editing tool, a publishing tool, plus loads of images, icons and other templates, all within one platform. And the best bit of all?
It’s free.
But I get it - it’s tough to know where to begin, right? Whether you’re creating Facebook post images, infographics or email headers, it can be overwhelming to know where to start.
That’s what today’s post is all about. I’m going to walk you through how you (as a blogger, creative entrepreneur or business owner), can use Canva, with any level of skill or knowledge.
I’ll even give you plenty of examples along the way as we walk through the main steps you can take to use Canva to uplevel your creation of visual content.
P.S. Want even more tips to learn how to create an amazing blog? Grab this free guide full of tips from successful bloggers!

STEP ONE - CHECK IN WITH YOUR CONTENT STRATEGY
If you’ve been reading this blog for any length of time, you’ll know there’s one particular process I really believe in: planning.
You don’t need to have the fanciest editorial calendar in the world. Just something simple to keep you organised - (you can read about how I create my calendar using Google Docs here).
What you do need to be aware of are these things (which I cover in more depth here):
- Who your readers are and what they want to know
- Their feedback and the messages they give you
- What platforms your content is going to be shared on
Let’s take my brand, A Branch of Holly, and the promotion of this particular post as an example. The primary purpose of this post is to give my readers valuable information on how to use Canva to help them grow their online presence, and to make them want to share it with their own community.
For this example, I’ll want to make sure I create a graphic for my blog post and Pinterest, as well as social sharing graphics for Facebook, Twitter and Instagram.
STEP TWO - FIND THE RIGHT TEMPLATES
When you navigate to the different types of designs you can create with Canva, there are loads to choose from. I’ll walk you through how they’re organised.
The first thing to be aware of is that the templates are organised into categories to help you find what you’re looking for easily. Here are the different categories you can find:
- Social media posts
- Documents
- Blogging & eBooks
- Marketing materials
- Social media & email headers
- Events
- Ads

You don’t need to fuss around with dimensions or anything. Each template is optimised with exactly the right dimensions for the purpose of each platform.
When you pick a particular template to start off with, you’ll be taken to a page where you can start designing. Now, it can be intimidating at first to start off with a blank canvas. But it doesn’t have to be that way when you’re using Canva - and you don’t even need to hire a designer to help.
For the promotion of this blog post, I’ll start off with a Twitter graphic template:

Next up, I’m going to show you how you can edit this template to create a simple sharing graphic.
STEP THREE - ADD YOUR IMAGE
Remember one of the facts I shared with you earlier?
Tweets with images receive 150% more retweets than tweets without images.
And since you want your content to be shared on social media to generate more traffic and engagement, you want to include a visual in your graphic. You can either use your own images (which I do), upload an image from a stock photo site or pick one from Canva’s built-in image library.
To use the library, just type a keyword or two into the search bar and choose from the results that come up.
I like to make sure that all my graphics are branded, so I’ll upload my own.
To do that, just click the upload button and choose the image you want from your computer. Then navigate to Elements, Grids, drag and drop a one square grid,, then drag and drop it your image into it.

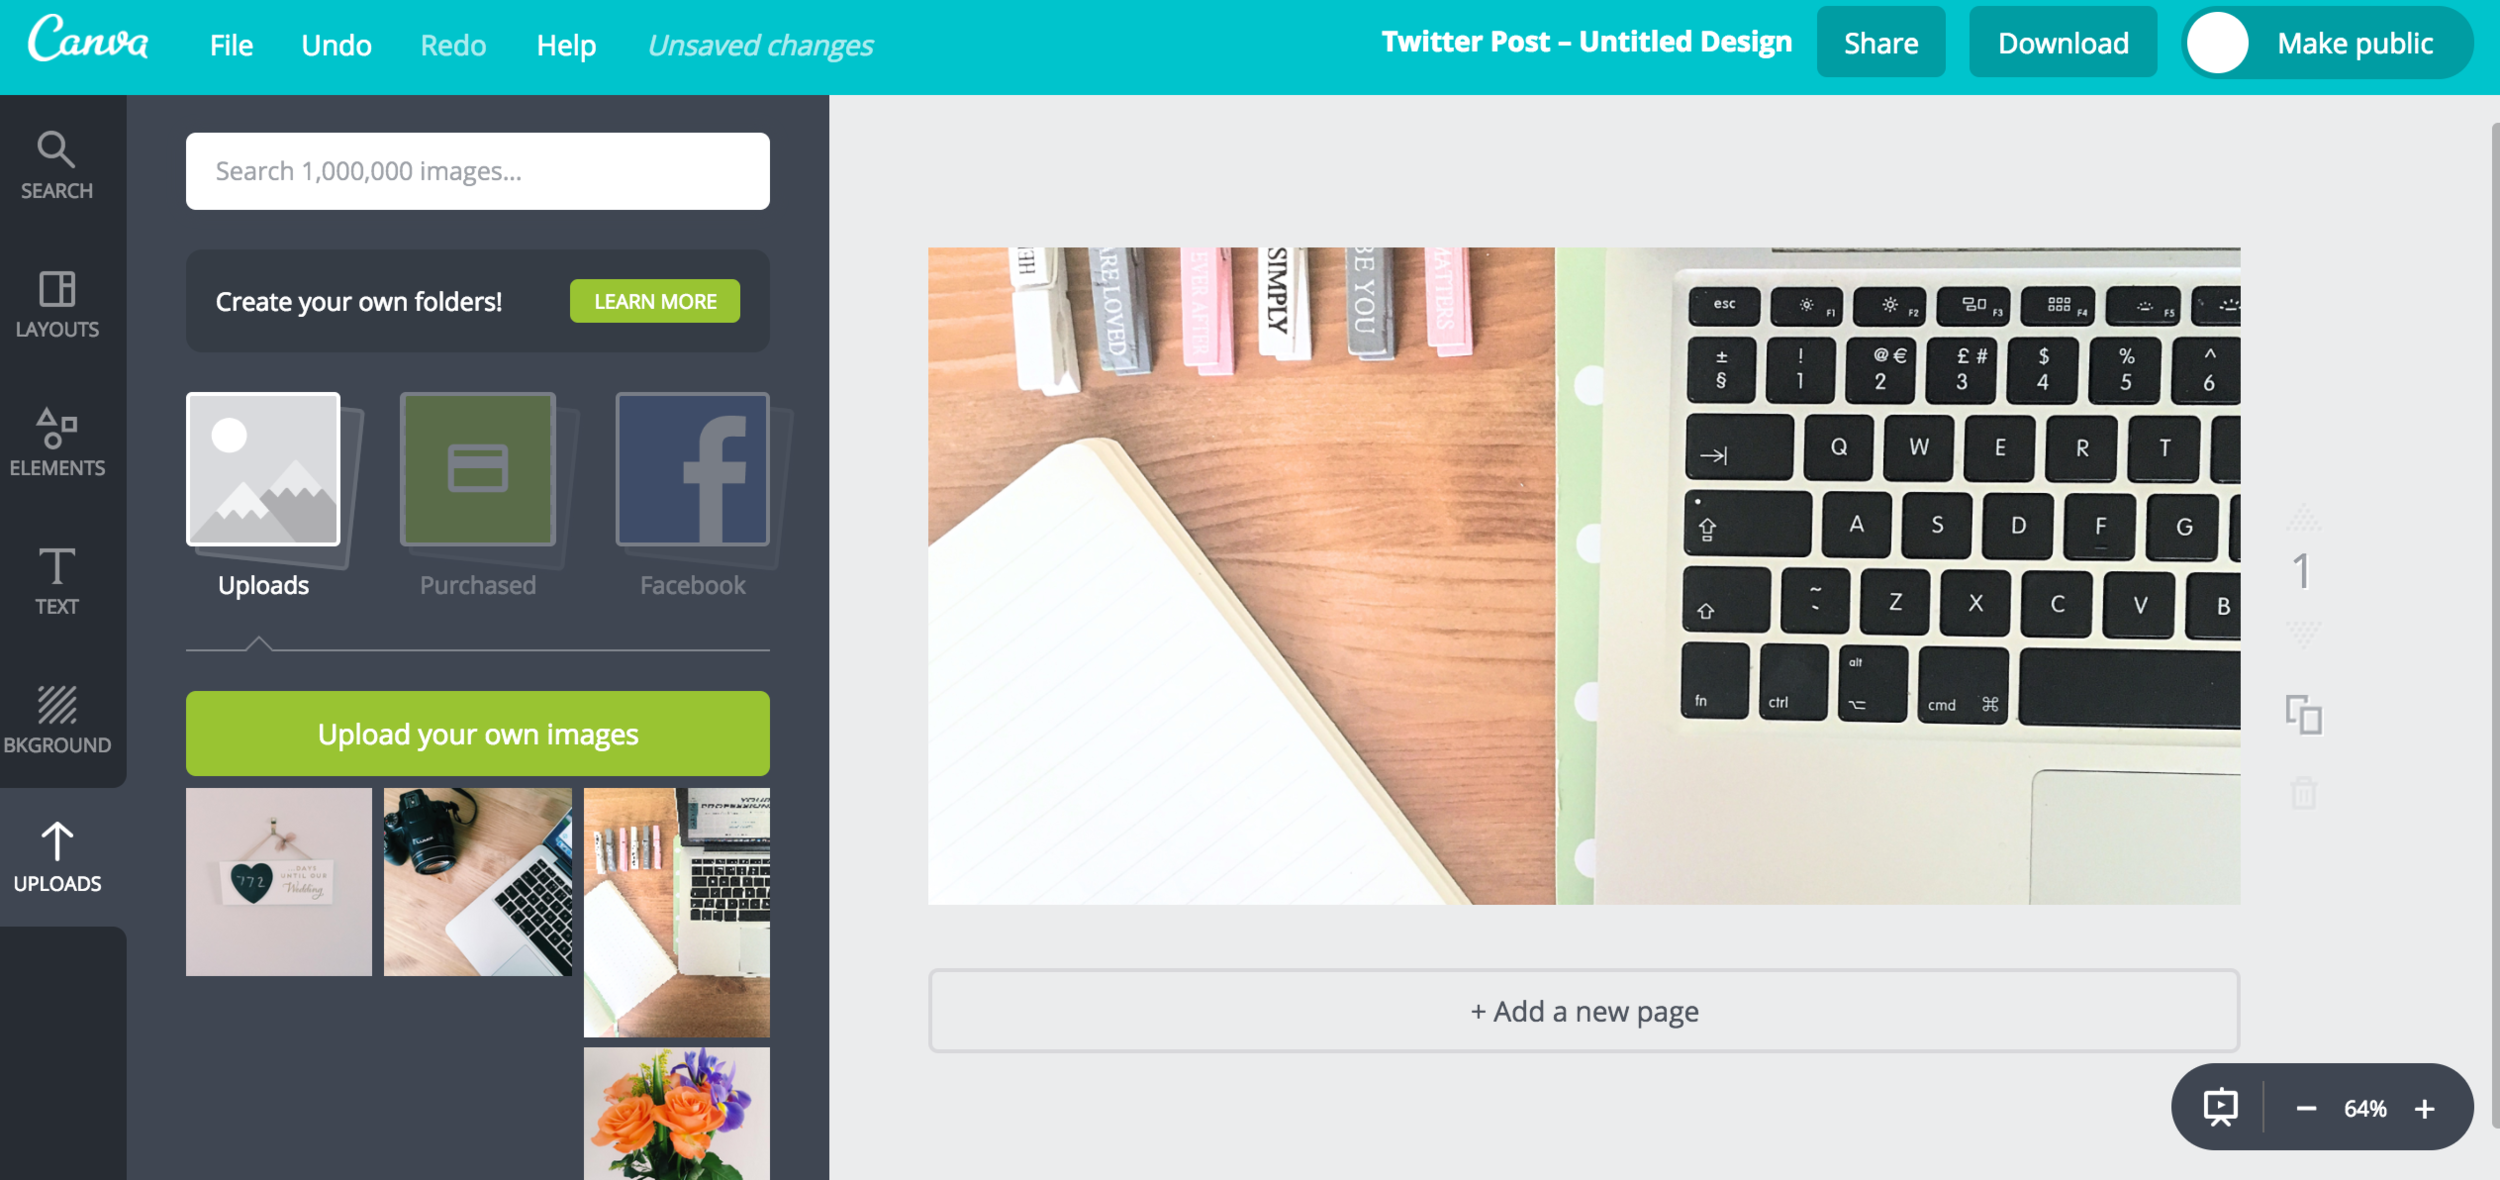
STEP FOUR - ADD SOME TEXT TO YOUR IMAGE
Now that my image is on there (the same one I’m going to use in my blog post graphic), it’s time to add some text. This is really great in telling your audience exactly what your content is going to be about (whilst showing off your great headline too!)
All you need to do is add some text and fill it in with your headline.
If you want to upload your fonts you have to pay for the business version - luckily for me, one of my fonts is included in Canva’s font library.

It’s fine if you just want to include your image, but the best recipe for a social media graphic includes both visuals and text. So like I said, you want to make sure your fonts match up with your brand.
STEP FIVE - ADD A BACKGROUND TO YOUR TEXT
So at the moment, this is what the graphic looks like:

The text is a bit difficult to see, right?
Adding a background to your text means your headline will be clear to read, and you’ll still be able to see your image too.
To do this, click on Elements in the left-hand toolbar, click on Shapes and drag the first square shape onto your image (make sure to copy your headline because you’ll have to put the box in first THEN your text).

Then just play around with the sizing to create a sort of rectangular shape. Paste your headline back into the box.

STEP SIX - COPY THE SAME THING FOR ALL YOUR DIFFERENT SHARING PLATFORMS
That was easy, right? You’ve got your first visual - congrats! Now you want to create the same thing (or similar) for your different social platforms. But as you probably know, that involves making different sized graphics.
You can use Canva’s Magic Resize Tool, but that’s only available for paid users. But it’s just as simple to copy and paste each element of your graphic into each of the templates. Then you’re good to go!

STEP SEVEN - DOWNLOAD THE IMAGE AND SHARE IT
Now all that’s left to do is share your image! You can either share it immediately by clicking the Share button and adding a caption, or if you want to share it later (like I do), just head to Download, download it as the recommended file type, save it somewhere in your folders on your computer and then it’ll be ready for you when you need to upload it when you’re scheduling your social posts.

BONUS STEP - USE CANVA’S FREE RESOURCES TO CREATE EVEN BETTER GRAPHICS
It’s officially as simple as that. But there is room for you to learn more about using Canva and improving your design skills. All you need to do is head to Canva’s Design School.
With daily articles, interactive tutorials and loads of tips, you can learn everything you need to know from inspiration, to typography, to editing and branding. Plus there are also loads of case studies which are well worth a read!

This is just one example that you can transfer across to all the different templates within Canva. But there’s so much more for you to experiment with. From adding icons, to creating presentations and infographics, all your design elements for your blog or biz can be created with Canva.
The lesson? Don’t let visual content intimidate you. It’s necessary all about skills - it’s about knowing what tools are best for you.
Now go and have a play around and show me what you come up with - I can’t wait to see it!

Do you use Canva for your visual design elements? What other image creation tools do you like using?
