HOW TO BE A PRO AT SCHEDULING TWEETS
Let’s start off today’s post with a little story. Two years ago I was well underway with my MA course in Magazine Journalism. One day we were working on a project. I was on InDesign and a guy next to me was doing some research on Twitter. Then this happened:
Him: “Holly, you just tweeted.”
Me: “No I didn't.
Him: “Well you’ve just appeared at the top of my feed. But you’ve been on InDesign this whole time, so how did you do it?
Me: “Oh, yeah, I schedule all my tweets to go out, because I know I won’t be able to do them during the day.”
Him: “What?! You can schedule tweets?!”
I’ve been scheduling tweets for over two years. Over that time, I’ve built up a community of over 1,000 followers and tweeted over 7,000 times. Twitter has also been the biggest referrer of traffic to my blog for the past six months.
Pretty amazing what scheduling tweets can do, right?
But what I thought when I had this conversation was: how many people don’t know how to do this, but would like to know? How many people would this help?
The answer is a lot.
Recently, I’ve seen quite a few people talking about the struggles of scheduling tweets and knowing where to start. So today, I’m taking things back to basics and going through a quick "how-to" guide for becoming a pro at scheduling tweets.
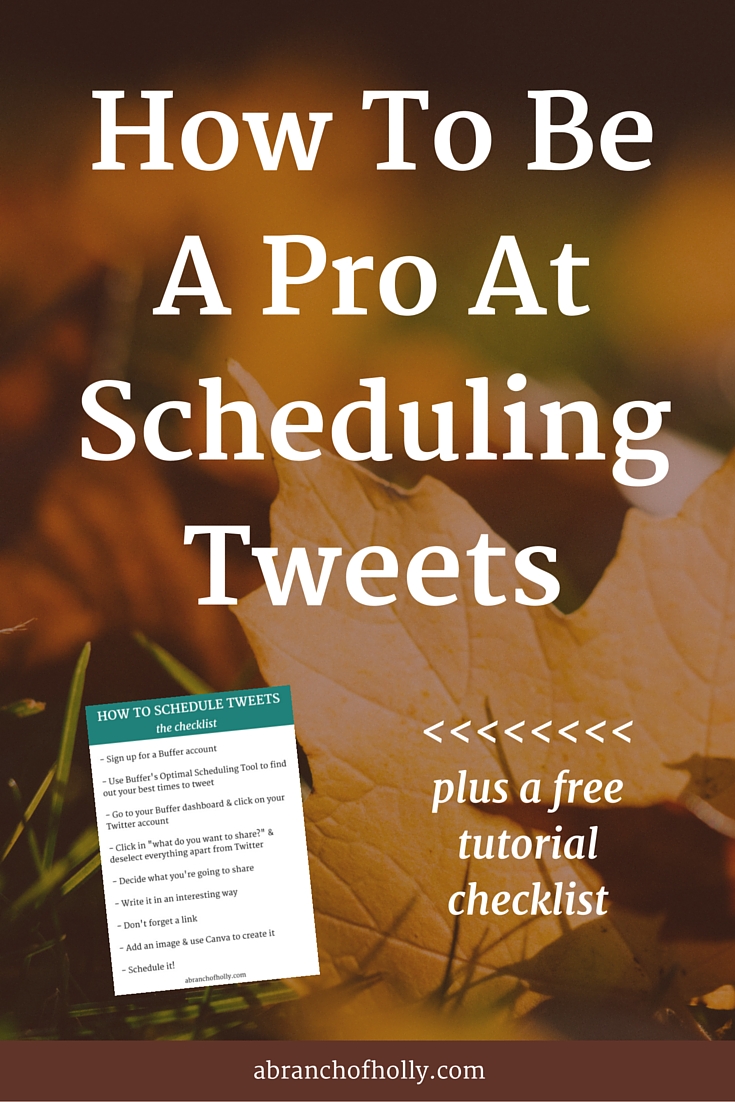
PST! If you want a shorter version of this that you can just work your way through, I've made a checklist for you! Hit the button below to get it.
STEP ONE: Choose your scheduling tool
Sooooo because Buffer is completely amazing and I love it, that’s what we’re going to be using for the tutorial in this post. You can of course, use Hootsuite, but I strongly advise you to try out Twitter, OK? Alright.
And if you’re still unsure, you can read this post here telling you just why Buffer is so great.
STEP TWO: Find out the best times to tweet
Now I don’t mean general times like lunchtime or first thing in the morning. I mean finding out the times when your specific audience is online.
What, can you really do that?
Yep! And luckily for us, Buffer have got their own tool to help you find out your optimal times to tweet that will sync straight with your Buffer account.
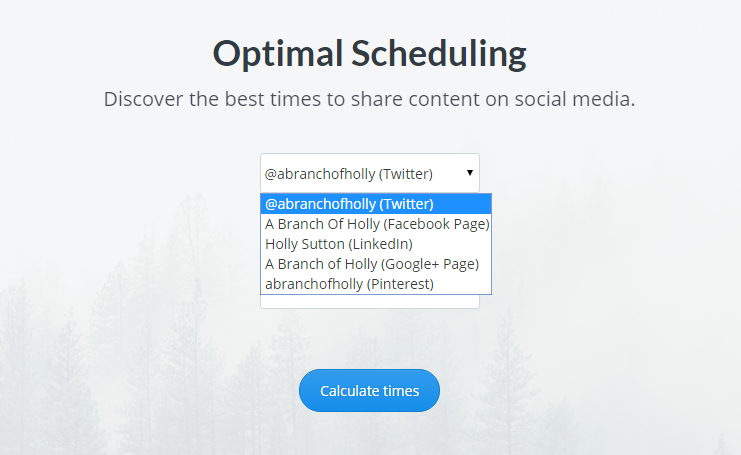
All you need to do is type “buffer optimal scheduling tool” into Google and click on the link for this.
Once you’re there, log into your Buffer account with one of your social media profiles your email.
Pick the social account you want to optimise – for this tutorial we’re using Twitter, but it works the same with all your other accounts too.
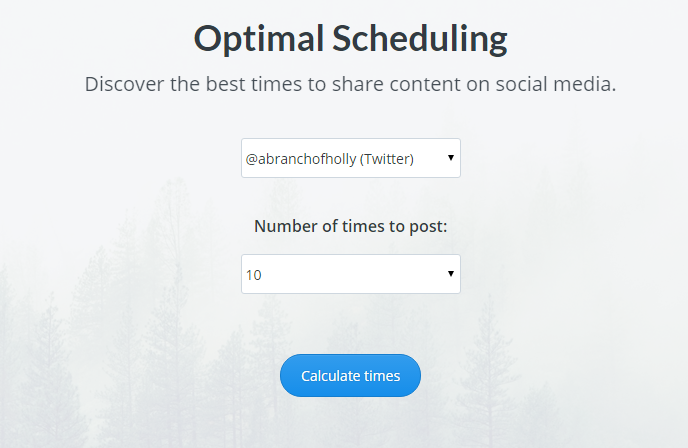
Then, pick how many times you want to post to Twitter in a day. The average tweet has a life span of about 18 minutes, so somewhere between 5 and 10 is the best bet.
Once you’ve done that, hit “calculate times” and you should see something like this…
This tells you the best times for you to tweet when your audience is online. So for me, it tells me the top ten. As you can see, it shows you them in a list and in a cool graph too so you can see which are your peak times.
So in this graph, 8:20pm looks to be my best time so that could be great for tweeting a link to my blog post published that day.
Then, hit “replace existing schedule”.
You’ll see that those times have been directly inputted into your Buffer schedule!
Awesome, right?
Your audience’s habits will change all the time so make a note somewhere to remind yourself to do this every week. That way you’re keeping up with the optimal times on a regular basis.
STEP THREE: Pick your twitter account to update
So now we’ll quickly go through how you can actually schedule a tweet.
Go to your Buffer dashboard, and click on your Twitter account in the left-hand corner.
You’ll see a little box that says, “what do you want to share?” Click in that.
You might find that all your social media accounts connected to your Buffer are selected. This means that if you write something in the box and press “add to queue”, it’ll be added to the queue for all your social channels.
Well, we don’t want that right now?
So if you click on every social media platform there apart from Twitter, it should look like this:
That way, only your Twitter account is selected and your content will only be added to this queue.
STEP FOUR: Decide what to share
Now here comes the bit that many of you struggle with.
But what the hell do I share on Twitter?
Well, luckily for you I’m in the process of creating a super-amazing resource for you that will tell you exactly the type of things you can share on social media that’ll keep you going for every single day of the year.
But for now, here’s just a little preview into the workbook and some of the types of things you can share on Twitter:
- Quotes (I guarantee if you use #qotd you’ll get some form of engagement)
- Book recommendation
- Tip of the day
- Behind-the-scenes picture
- Meme
- GIF
- Mention other people your community should follow
- Ask a question
- Respond to a question
- Useful resource
- Style inspiration
- Something you want for Christmas
- A poll (this is a new feature on Twitter)
- Fill in the blank
- A Pinterest board
I could go on and on, but then I’d be giving the entire book away, wouldn't I? ;)
STEP FIVE: Decide How You’re Going To Write It
By this, I mean what you’re actually going to put in your update.
So let’s say, for the bloggers out there, that you’re sharing your latest post.
It would be so easy to put this:
But it’s just the title of the blog post.
That’s boring.
You want to craft a tweet that’s going to make people not have a choice but to click on the link to your post.
Here are some ways you could do it using a few examples from a few different blog posts:
- Wanna be part of a brand new series? Want access to exclusive content? This is for you!
- You NEED to read this guest post from @korymae on @freeborboleta about adding content upgrades to your #blog !
- Do you struggle with getting things done & meeting deadlines? This is what you need!
- Plan for lunch: To pose with our Starbucks #redcups
- WOW. @christyoshoney has been smashing #Periscope lately & here's what she's learnt so far! http://buff.ly/1RIJMEk
See how they’re all different but great in their own ways?
If you just post the headline to each blog post, your feed will look boring. People will be more intrigued if you tell them in your tweet why you need to read it.
STEP FIVE: Include a link
If you’re sharing your own blog post or someone else’s content, make sure to include a link. You’ll notice Buffer shortens them too, like this:
STEP SIX: Include hashtags where you can
It’s always good to include hashtags. But instead of just putting them at the end of your tweet, why not try to include them within it like the one above? This way it makes it look more natural.
Top Tip: Don’t use more than two hashtags. Any more and your engagement starts to go down.
STEP SEVEN: Add an image
If you use an image with a tweet, you could get up to 150% more engagement.
Say what?
It’s a no-brainer. Add an image. Use Canva and go to the Twitter template to create one that’s the perfect size.
STEP EIGHT: Schedule your tweet
Now you’re good to go. Hit “add to queue” and you’ll see that your tweet has been added in the queue for the next available time in your posting schedule.
Here are some that I scheduled earlier!
That, my friends, is how you become a pro at scheduling tweets.
Remember, if you want a shorter, step-by-step version of this post that you can access whenever you want, hit this button...
Does scheduling tweets help you? If you've never tried it before, do you think you 'll give it a go? I'd love to know what you thought of this tutorial in the comments!


